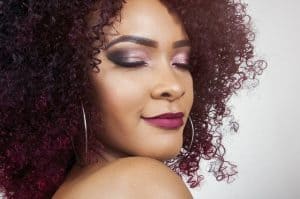
Hooded eyes have added skin near the brow bone that droops over the eyelid, which makes the lid look smaller but can make the opened eye look wider and brighter. The trade-off for larger looking eyes is that a lot of eye makeup techniques don’t work well because the lid isn’t visible when your eyes are open. This is particularly true of looks involving work in the crease, or the dividing line between the lid and the brow bone. Cut crease looks involve placing a bold color in the crease for a funky, graphic look—and even those with hooded eyes can achieve this look. It simply takes a bit of knowledge and practice.

What You Need:
- Eyeshadow primer
- Eyeshadow brush
- Light shimmery eyeshadow
- Small crease brush
- Dark matte eyeshadow
- Blending brush
- Eyeliner pencil
Step 1: Prepping the Lid
Use your clean fingers to apply an eyeshadow primer across your entire eyelid, working from the lash line up to right underneath the eyebrow. Lightly pat the primer into the inner corner of your eye and along the lower lash line. Allow the primer to dry for at least five minutes.
Use an eyeshadow brush to apply a light, shimmery eyeshadow all over the lid and up to right under the eyebrow arch. This will look odd at the moment but will make sense once the look is complete.
Step 2: Defining the Crease
Hooded eyes don’t have a defined crease because it disappears behind that fold of skin. So you will need to fake a new crease in an area that’s visible when your eyes are open. Take a tiny amount of a dark, matte eyeshadow onto a small crease brush and use that to draw your new crease line.
Hold your eyes wide open and look straight into a mirror. Use gentle strokes to create a crease line on the lowest part of skin that’s visible above your lid when your eyes are open. Extend the line at the outer corner to create a reverse v-pattern with the lower arm of the “v” connecting with your lower lash line. This shape is essential to the cut crease look and will make your eyes look more wide-set.
Step 3: Darkening the Crease
Apply more dark shadow to the crease brush and continue defining that line you sketched out. Cut crease looks involve a lot of drama, so make the line as dark as you want. Don’t take the color too far up towards the brow bone, as you need that lighter color to still exist above to serve as highlight. Otherwise, you can look like you have a black eye.
When you are happy with the definition in your crease, use a dark eyeliner pencil along the bottom lash line. The upper lash line probably isn’t visible, so instead use the pencil to tightline. To tightline, use the well-sharpened pencil to line the rim of the lid right below the upper lashes. This makes lashes look fuller and the eye look brighter.
